✨ Introduction
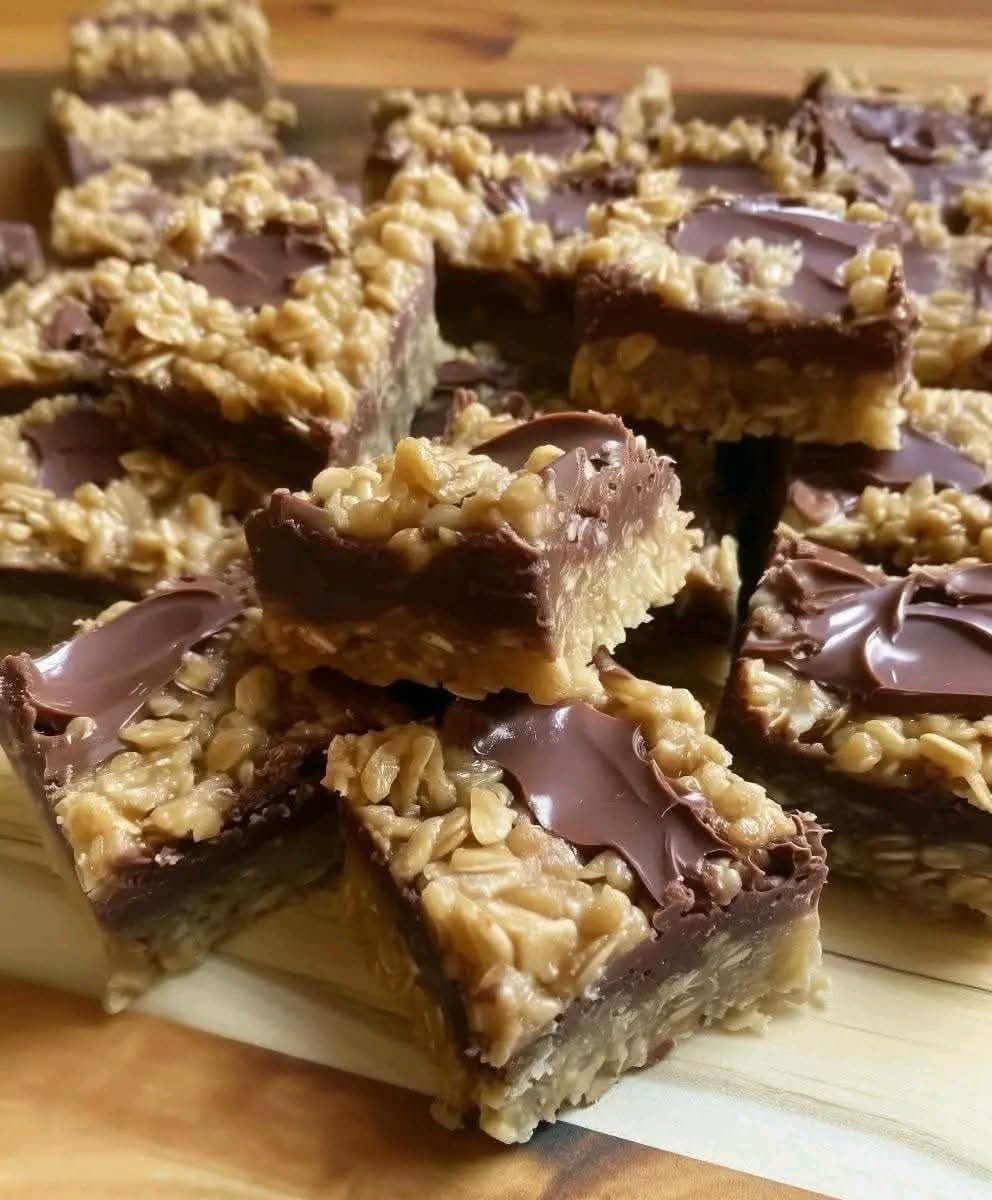
I baked about 100 dozen cookies for the holidays, and after all those batches, these bars were the ones everyone kept coming back for! 😋 They’re soft, buttery, sweet, and wonderfully comforting—the kind of homemade treat that disappears from a dessert table before you even realize it.
What makes these holiday cookie bars especially wonderful is how easy they are to prepare ahead of time. They’re perfect for Christmas gatherings, cookie exchanges, family celebrations, bake sales, potlucks, or simply keeping a batch in the freezer for unexpected guests.
And yes—you can freeze them! Just thaw the bars for about 10 minutes before serving, and they’re ready to enjoy.
⸻
🛒 Ingredients
For the Cookie Bar Base
- 1 cup unsalted butter, softened
- 1 cup granulated sugar
- ½ cup packed brown sugar
- 2 large eggs
- 2 teaspoons vanilla extract
- 2½ cups all-purpose flour
- 1 teaspoon baking powder
- ½ teaspoon baking soda
- ½ teaspoon salt
For the Sweet Topping
- ½ cup butter, softened
- 1½ cups powdered sugar
- 1 teaspoon vanilla extract
- 2–3 tablespoons milk or cream
Optional Holiday Additions
- ½ cup chopped pecans or walnuts
- ½ cup white chocolate chips
- Holiday sprinkles
- Colored sugar
- Crushed peppermint candies
- A light dusting of powdered sugar
⸻
👩🍳 Instructions
Step 1: Prepare the Oven
Preheat your oven to 350°F (175°C).
Line a 9×13-inch baking pan with parchment paper, leaving a little overhang on the sides. This will make it much easier to lift the finished bars from the pan.
Lightly grease the parchment paper.
Step 2: Cream the Butter and Sugars
Place the softened butter, granulated sugar, and brown sugar in a large mixing bowl.
Beat until the mixture becomes light, creamy, and fluffy.
This step is important because properly creamed butter helps create a tender and pleasant texture.
Step 3: Add the Eggs and Vanilla
Add the eggs one at a time, mixing well after each addition.
Add the vanilla extract and mix until everything is smooth and evenly combined.
Step 4: Combine the Dry Ingredients
In a separate bowl, whisk together:
- Flour
- Baking powder
- Baking soda
- Salt
Gradually add the dry ingredients to the butter mixture.
Mix just until the flour disappears. Avoid overmixing, because too much mixing can make the bars tougher.
Step 5: Add Optional Ingredients
If you want extra texture and holiday flavor, gently fold in chopped pecans, walnuts, or white chocolate chips.
You can also add festive sprinkles for a colorful holiday appearance.
Step 6: Spread the Dough
Transfer the dough to the prepared baking pan.
Use a spatula or the back of a spoon to spread it evenly into the corners.
Try to keep the thickness as even as possible so the bars bake uniformly.
Step 7: Bake
Place the pan in the preheated oven.
Bake for approximately 20–25 minutes, or until the edges are lightly golden and the center is set.
Do not overbake. The bars will continue to firm up as they cool.
Step 8: Cool Completely
Remove the pan from the oven and allow the bars to cool in the pan.
For the cleanest slices, let them cool completely before adding the topping and cutting.
⸻
🍰 Making the Topping
Beat the softened butter until creamy.
Gradually add the powdered sugar while mixing.
Add vanilla and enough milk or cream to create a smooth, spreadable consistency.
Continue beating until light and fluffy.
Spread the topping evenly over the completely cooled cookie bars.
For a festive finish, add holiday sprinkles, chopped nuts, or a light dusting of powdered sugar.
⸻
🔪 Forming & Cutting the Bars
Once the topping has set slightly, carefully lift the entire slab from the pan using the parchment-paper handles.
Place it on a cutting board.
Using a sharp knife, cut into squares or rectangles.
For beautiful bakery-style pieces, wipe the knife clean between cuts.
You can make small bite-sized squares for cookie trays or larger bars for individual desserts.
⸻
❄️ Freezing Method
One of the best things about these holiday bars is that they can be prepared in advance.
Allow the bars to cool completely before freezing.
For best results:
- Cut the bars into individual portions.
- Place them in a freezer-safe container.
- Separate layers with parchment or wax paper.
- Seal the container tightly.
- Label with the date.
- Place in the freezer.
When you’re ready to serve them, remove the desired number of bars from the freezer and allow them to thaw for about 10 minutes before serving, as suggested in the original holiday tip.
For the best texture, avoid repeatedly freezing and thawing the entire batch. Freeze individual portions instead.
⸻
💡 Helpful Baking Methods & Tips
Use softened butter
Butter should be soft enough to mix easily but not melted. Melted butter can change the texture of the finished bars.
Don’t overmix
Once the flour is incorporated, stop mixing. This helps keep the bars tender.
Don’t overbake
The center should be set, while the edges may be lightly golden. Overbaking can make cookie bars dry.
Let them cool
Cutting them while they’re hot can cause them to crumble or lose their shape.
Make them festive
Sprinkles, chopped nuts, white chocolate, peppermint pieces, or powdered sugar can transform simple cookie bars into a beautiful holiday dessert.
⸻
🎄 A Little Holiday History
Cookies and bar desserts have long been part of holiday baking traditions. Families often prepare large quantities during the festive season because homemade sweets are easy to share with relatives, neighbors, friends, and guests.
Cookie bars became especially popular because they offer the comforting flavor of traditional cookies while eliminating the need to individually shape every piece of dough.
Instead of rolling and cutting dozens of individual cookies, the dough can be spread into one pan, baked, cooled, and sliced into many portions.
That makes recipes like these particularly useful when you’re preparing desserts for a large holiday gathering—or, apparently, when you’re baking 100 dozen cookies! 😄
⸻
❤️ Benefits of Homemade Holiday Bars
While these are definitely a dessert and best enjoyed as an occasional treat, homemade baking has some wonderful practical benefits:
- You control the ingredients.
- You can adjust the sweetness to your preference.
- You can add nuts, chocolate, or festive toppings.
- They are convenient for large gatherings.
- They can be prepared ahead of time.
- They freeze well when properly packaged.
- Individual portions make serving easy.
- They make wonderful homemade gifts.
Most importantly, baking can create memories. A tray of homemade bars sitting on the kitchen counter can become part of the holiday atmosphere itself.
⸻
🎁 Serving Ideas
Serve these bars with:
☕ Coffee
🍵 Hot tea
🥛 Cold milk
🍫 Hot chocolate
🍨 Vanilla ice cream
🍓 Fresh berries
For a beautiful holiday dessert platter, arrange the bars alongside different cookies, brownies, chocolate treats, and candies.
A simple dusting of powdered sugar can make them look especially festive.
⸻
👨🍳 Make-Ahead Method
If you’re preparing for a holiday party, don’t wait until the last minute.
Bake the bars several days ahead, allow them to cool completely, cut them into portions, and store them properly.
For longer storage, freeze them in airtight packaging.
This makes holiday entertaining much easier because your dessert is already prepared and waiting.
⸻
❤️ Why Everyone Loves Them
There is something special about a dessert that doesn’t need to be complicated to be delicious.
These cookie bars are soft, buttery, sweet, easy to portion, and perfect for sharing. They have that nostalgic homemade quality that makes people reach for “just one more.”
And when you’re baking for a crowd, recipes that can be made ahead and frozen are absolute lifesavers.
⸻
🌟 Conclusion
After baking about 100 dozen cookies for the holidays, having one recipe stand out as everyone’s favorite says a lot!
These holiday cookie bars are simple enough for everyday baking but special enough for Christmas celebrations, cookie exchanges, family gatherings, and dessert tables.
Make them ahead, freeze them, thaw them for about 10 minutes, and enjoy a homemade treat whenever you need one.
They’re the kind of recipe you’ll want to keep in your holiday baking collection year after year. ❤️
⸻
🍪 For the Cookie Lovers
If you love soft, homemade holiday desserts, these bars are definitely worth adding to your baking list.
They’re easy to make, easy to share, and even easier to love.
Bake a batch, freeze a few for later, put some on a holiday platter, and watch how quickly they disappear! 🎄🍪❤️