Introduction
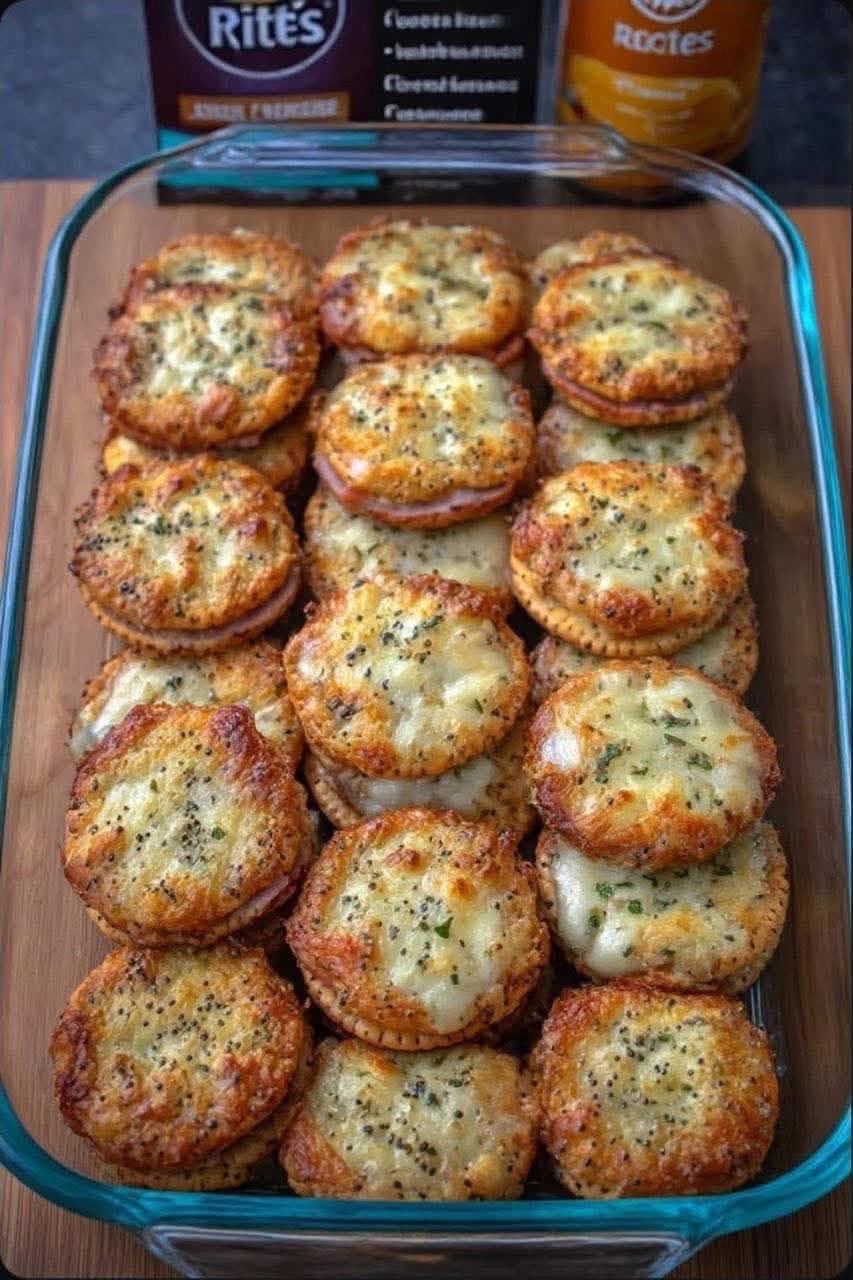
Oh my gosh! These cheesy party bites are one of those recipes that disappear almost as soon as they hit the table! They are golden on the outside, soft and cheesy on the inside, and packed with comforting flavor in every bite.
I originally made these for my son’s birthday party and quickly discovered that I had not made nearly enough. They were completely gone within minutes! Everyone kept reaching for “just one more,” and before I knew it, the serving plate was empty.
They are wonderfully versatile, too. While a mild melty cheese works beautifully, you can easily use cheddar, Monterey Jack, mozzarella, or a combination of your favorite cheeses.
Whether you are preparing a birthday party, family gathering, game-day snack, holiday appetizer, or simply want something delicious for the weekend, these little bites are an excellent choice.
Ingredients
For the cheesy bites
- 2 cups all-purpose flour
- 2 teaspoons baking powder
- ½ teaspoon salt
- ¼ teaspoon black pepper
- ½ teaspoon garlic powder
- ½ teaspoon onion powder
- 2 large eggs
- ¾ cup milk
- ¼ cup melted butter
- 1½ cups shredded cheese
- 2 tablespoons chopped fresh parsley
- 2 tablespoons finely chopped green onions, optional
Optional additions
- ½ teaspoon paprika
- A pinch of dried oregano
- A pinch of chili flakes for a little heat
- ½ cup finely chopped cooked bacon or turkey bacon
- ¼ cup finely chopped jalapeños
- Extra shredded cheese for topping
For serving
- Ranch dressing
- Garlic aioli
- Marinara sauce
- Honey mustard
- Sour cream
- Your favorite dipping sauce
Instructions
Step 1: Prepare the oven
Preheat your oven to 375°F (190°C).
Lightly grease a mini muffin pan or line it with small baking cups. You can also use a regular muffin pan if you prefer larger portions.
Step 2: Mix the dry ingredients
In a large bowl, whisk together the flour, baking powder, salt, black pepper, garlic powder, and onion powder.
Mixing these ingredients first helps distribute the seasonings evenly throughout the batter.
Step 3: Prepare the wet ingredients
In another bowl, whisk together the eggs, milk, and melted butter.
Make sure the melted butter has cooled slightly before adding it to the eggs.
Step 4: Combine everything
Pour the wet mixture into the bowl containing the dry ingredients.
Stir gently until just combined. Do not overmix, because overmixing can make the finished bites dense instead of light and tender.
Fold in the shredded cheese, parsley, and green onions.
The mixture should be thick and scoopable.
Step 5: Fill the pan
Spoon the mixture into the prepared muffin pan, filling each cup approximately ¾ full.
If desired, sprinkle a little extra cheese over the top of each bite.
Step 6: Bake
Place the pan in the preheated oven and bake for approximately 15–20 minutes, or until the tops are golden and the centers are cooked through.
For larger muffin-sized bites, they may need a few additional minutes.
Step 7: Cool slightly
Allow the bites to rest in the pan for about 5 minutes before removing them.
Serve warm with your favorite dipping sauce.
Cooking Method
The easiest method is baking, which gives the bites a beautiful golden exterior while keeping the center soft and cheesy.
For an extra-crispy top, you can place them under the broiler for the final 1–2 minutes, watching carefully so they do not burn.
You can also experiment with an air fryer. Arrange the bites in a single layer and cook until golden and heated through, checking them frequently because air-fryer cooking times vary.
A Little History
Cheese-filled baked snacks have appeared in many different forms across home cooking traditions. From savory cheese biscuits and muffins to stuffed pastries and small party appetizers, cooks have long combined simple doughs with flavorful cheeses to create convenient foods for sharing.
Modern cheesy bites take inspiration from these comforting traditions while making the preparation quick and easy. The muffin-pan method is especially useful because it creates individual portions that are perfect for parties and gatherings.
Why Everyone Loves Them
There are plenty of reasons these little bites are such a hit at parties.
🧀 Cheesy and flavorful
The melted cheese gives every bite a rich, savory flavor. Cheddar is especially delicious if you enjoy a stronger cheese taste.
🎉 Perfect for parties
Their small size makes them easy for guests to grab and eat without needing plates or utensils.
⏱️ Simple preparation
The batter comes together quickly using basic pantry ingredients.
👨👩👧 Family-friendly
They are easy to customize according to your family’s tastes. You can keep them mild or add herbs, peppers, or spices for extra flavor.
🥣 Great with dips
A warm cheesy bite paired with ranch, marinara, garlic sauce, or honey mustard makes an irresistible appetizer.
Formation & Presentation
For an attractive party presentation, arrange the cheesy bites on a large serving platter.
Place a small bowl of dipping sauce in the center and decorate the platter with fresh parsley or chopped green onions.
For a birthday celebration, you can serve them alongside other finger foods such as vegetable sticks, chicken bites, sandwiches, or mini burgers.
If you are making several varieties, try labeling them:
- Classic Cheese
- Cheddar & Herb
- Spicy Jalapeño
- Garlic & Parmesan
- Bacon & Cheese
This makes the platter look colorful and gives guests plenty of choices.
Cheese Variations
One of the best things about this recipe is how easy it is to change the cheese.
Cheddar
Sharp cheddar gives the bites a stronger, more pronounced flavor.
Mozzarella
Mozzarella creates a mild flavor with a wonderfully stretchy texture.
Monterey Jack
This is an excellent choice when you want something creamy and mild.
Pepper Jack
Perfect for anyone who enjoys a little spicy kick.
Cheese Blend
Try combining cheddar and mozzarella for both bold flavor and excellent melting.
Helpful Tips
Don’t overmix the batter. Stir just until the ingredients are combined.
Use freshly shredded cheese when possible. It generally melts nicely and gives the bites a great texture.
Don’t overfill the muffin cups. Leave some room for the bites to rise.
Serve them warm. They are especially delicious when the cheese is still soft and melty.
Make extra. If these are being served at a party, it is wise to prepare more than you think you need!
Make-Ahead Instructions
These cheesy bites can be prepared ahead of time.
Bake them according to the recipe, allow them to cool completely, and store them in an airtight container in the refrigerator.
When ready to serve, reheat them in the oven until warmed through.
They can also be frozen. Place cooled bites in a freezer-safe container with parchment paper between layers. Reheat from thawed or frozen until hot in the center.
Serving Ideas
Serve these alongside:
- Fresh vegetables
- Fruit platters
- Chicken wings
- Mini sandwiches
- Potato wedges
- Salads
- Soup
- Pasta dishes
They are also delicious as a quick breakfast or afternoon snack.
Conclusion
These cheesy party bites are proof that simple ingredients can create something incredibly delicious. With a golden exterior, tender center, and plenty of melted cheese, they are exactly the kind of snack that makes people come back for another one.
And if your guests finish the entire batch in minutes like they did at my son’s birthday party, don’t say I didn’t warn you!
If you love cheesy comfort food, this recipe deserves a place in your regular party rotation. Try it with cheddar, mozzarella, Monterey Jack, or your favorite cheese and make it your own.
For the Cheese Lovers ❤️
If you are a true cheese lover, don’t stop at the basic version! Add extra cheddar, a little Parmesan, garlic, herbs, or even a touch of spice.
Serve them hot, watch the cheese stretch as you pull one apart, and enjoy that first delicious bite.
These are the kind of homemade snacks that bring everyone to the table—and they rarely stay there for long!