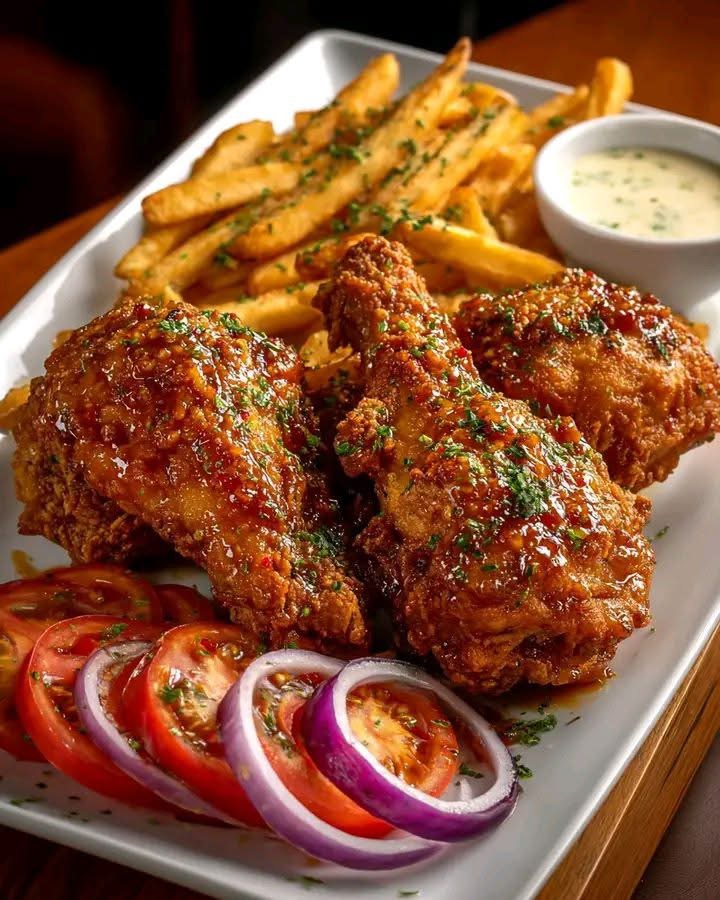
Crunchy Coating & Juicy, Tender Inside — Classic Homemade Comfort Food
🌟 Introduction
Few dishes are as comforting and satisfying as a plate of golden, crispy fried chicken. The outside is beautifully crunchy and seasoned, while the inside stays tender, juicy, and flavorful. This homemade version uses a buttermilk marinade to help tenderize the chicken and a well-seasoned flour coating to create that irresistible crunch.
Whether you’re preparing a family dinner, weekend gathering, picnic, or special celebration, crispy fried chicken is a dish that brings people together around the table. Serve it with mashed potatoes, coleslaw, biscuits, corn, roasted vegetables, or a fresh salad for a complete comfort-food meal.
🛒 Ingredients
For the Chicken
- 2 lbs chicken pieces — about 900 g
(drumsticks, thighs, wings, or breasts) - 1 cup buttermilk — 240 ml
- 1 teaspoon salt
- ½ teaspoon black pepper
- 1 teaspoon paprika
- 1 teaspoon garlic powder
For the Crispy Coating
- 2 cups all-purpose flour
- ½ cup cornstarch
- 1 teaspoon salt
- 1 teaspoon paprika
- 1 teaspoon garlic powder
- 1 teaspoon onion powder
- ½ teaspoon black pepper
- ½ teaspoon dried thyme
- ½ teaspoon dried oregano
- ½ teaspoon cayenne pepper, optional
- ½ teaspoon baking powder, optional
For Frying
- Vegetable, canola, peanut, or sunflower oil, enough for deep or shallow frying
Optional Flavor Additions
- ½ teaspoon smoked paprika
- ½ teaspoon dried parsley
- ¼ teaspoon chili powder
- ½ teaspoon mustard powder
- A pinch of cayenne for extra heat
🥣 Method 1: Marinating the Chicken
- Pat the chicken pieces dry with paper towels.
- Place the chicken in a large bowl.
- Add the buttermilk, salt, black pepper, paprika, and garlic powder.
- Mix thoroughly until every piece is coated.
- Cover the bowl and refrigerate for at least 2 hours.
- For even better flavor and tenderness, marinate overnight.
❤️ Why Buttermilk?
Buttermilk gives fried chicken a delicious tangy flavor while helping the chicken become tender. It also helps the flour mixture adhere to the chicken, creating a thicker, more satisfying crust.
🌾 Method 2: Preparing the Crispy Coating
In a large shallow bowl, combine:
- Flour
- Cornstarch
- Salt
- Paprika
- Garlic powder
- Onion powder
- Black pepper
- Thyme
- Oregano
- Cayenne pepper
- Baking powder, if using
Whisk everything together until the seasoning is evenly distributed.
🔥 Secret to Extra Crunch
The combination of flour + cornstarch helps create a lighter, crispier crust. For an especially craggy coating, drizzle 1–2 tablespoons of the buttermilk marinade into the seasoned flour and rub it through with your fingers. This creates little flour clumps that become delicious crunchy pieces during frying.
🍗 Method 3: Coating the Chicken
Remove one piece of chicken from the buttermilk marinade.
Allow the excess buttermilk to drip off, then place the chicken into the seasoned flour.
Press the flour firmly onto the chicken, making sure every surface is covered.
For an extra-thick crust:
Buttermilk → Flour → Buttermilk → Flour
The second coating creates a thicker, crunchier crust.
Place the coated chicken pieces on a wire rack and allow them to rest for about 10–15 minutes before frying. This helps the coating adhere better.
🍳 Method 4: Frying the Chicken
- Pour the oil into a heavy-bottomed pot or deep skillet.
- Heat the oil to approximately 350°F / 175°C.
- Carefully place a few chicken pieces into the oil.
- Do not overcrowd the pan because this can lower the oil temperature and make the coating greasy.
- Fry in batches.
- Turn the chicken occasionally so it cooks and browns evenly.
Cooking time depends on the size and type of chicken pieces. Smaller pieces will cook faster than large breasts or thighs.
The most important test is the internal temperature: chicken should reach 165°F / 74°C in the thickest part.
🧺 Method 5: Draining
Once the chicken is deeply golden and fully cooked, carefully remove it from the oil.
Place it on a wire rack set over a baking sheet.
Avoid stacking the pieces directly on paper towels if you want maximum crispiness. A wire rack allows air to circulate underneath the chicken so the crust stays crunchy.
Sprinkle lightly with a little salt while the chicken is still hot.
✨ Formation of the Perfect Fried Chicken
The magic of this recipe comes from several simple stages:
Marinade → Seasoning → Flour Coating → Resting → Frying → Draining
The buttermilk provides moisture and flavor. The seasoned flour creates the outer crust. Cornstarch contributes extra crispness, while proper oil temperature allows the coating to become golden without absorbing excessive oil.
The result is the ideal contrast:
🥰 Crunchy outside
🍗 Juicy inside
🌶️ Flavorful seasoning
✨ Beautiful golden color
🕰️ A Little History
Fried chicken has a long and complicated culinary history. The dish as it is widely known today developed particularly strongly in the American South, where different culinary traditions—including techniques brought by Scottish immigrants and West African culinary traditions—contributed to the evolution of fried chicken.
Over generations, cooks developed their own combinations of spices, marinades, frying techniques, and family secrets.
Today, fried chicken is enjoyed around the world, with countless regional versions. Some recipes are spicy, some are heavily seasoned, some use buttermilk, while others use brines or different coatings.
The beauty of homemade fried chicken is that every family can create its own signature version.
❤️ Benefits of Homemade Fried Chicken
While fried chicken is definitely a comfort food and is best enjoyed as part of a balanced diet, homemade preparation gives you control over the ingredients.
🍗 Protein
Chicken provides protein, which is important for maintaining muscles and supporting normal body functions.
🧄 Flavor Without Complicated Ingredients
Garlic, paprika, black pepper, onion powder, and herbs add plenty of flavor without requiring complicated sauces.
🏠 Homemade Control
Cooking at home allows you to choose the quality of the chicken, seasoning, oil, and other ingredients.
🥗 Easy to Balance
Pair the chicken with vegetables, salad, beans, or another nutrient-rich side for a more balanced meal.
👨👩👧👦 Family-Friendly
It’s easy to prepare a large batch, making it especially useful for family dinners and gatherings.
Because this is fried food, it is relatively high in calories and fat compared with baked or grilled chicken. Enjoying reasonable portions alongside vegetables and other balanced foods is a good approach.
🍽️ What to Serve With Crispy Fried Chicken
Create a complete comfort-food dinner with:
🥔 Creamy mashed potatoes
🥬 Homemade coleslaw
🌽 Buttered corn
🥖 Warm biscuits
🥗 Fresh garden salad
🥦 Steamed or roasted broccoli
🍠 Sweet potato fries
🧅 Pickles and onions
🍚 Seasoned rice
For dipping:
- Honey mustard
- Garlic sauce
- Ranch-style dressing
- Hot sauce
- Barbecue sauce
- Creamy pepper sauce
🔥 Tips for the Crispiest Chicken
1. Don’t Skip the Marinade
A longer marinade gives the chicken more flavor and tenderness.
2. Season Every Layer
Season both the chicken and the flour mixture. This prevents the crust from tasting bland.
3. Use Cornstarch
Cornstarch helps produce a lighter, crunchier coating.
4. Don’t Overcrowd the Pan
Too many pieces at once can cause the oil temperature to drop.
5. Maintain the Oil Temperature
If the oil is too cool, the chicken can become greasy. If it’s too hot, the coating may burn before the chicken is fully cooked.
6. Use a Thermometer
The safest way to check doneness is to measure the chicken’s internal temperature.
7. Drain on a Rack
A wire rack keeps the bottom crust from becoming soggy.
8. Let It Rest
Give the fried chicken several minutes to rest before serving.
👨🍳 Chef’s Extra-Crispy Trick
For an exceptionally crunchy crust, make sure your flour mixture contains small irregular clumps.
Simply take a spoonful of the buttermilk marinade and sprinkle it into the seasoned flour. Mix it gently with your fingers.
Those little pieces of moistened flour cling to the chicken and fry into crispy, crunchy flakes.
That’s the secret to getting those beautiful rough, golden, restaurant-style edges.
💕 For the Lovers of Comfort Food
This is the kind of meal that makes people say:
“Just one more piece!” 😍
The smell of seasoned chicken frying, the sound of that first crispy bite, and the combination of crunchy coating with tender chicken make this recipe perfect for anyone who loves traditional comfort food.
It’s wonderful for Sunday dinners, family gatherings, picnics, game nights, holidays, or simply when you’re craving something warm and satisfying.
🧑🍳 Preparation Summary
Step 1
Marinate chicken in buttermilk and seasonings.
Step 2
Prepare the seasoned flour and cornstarch mixture.
Step 3
Coat each chicken piece thoroughly.
Step 4
For extra crunch, double-coat the chicken.
Step 5
Rest the coated chicken before frying.
Step 6
Fry in batches at approximately 350°F / 175°C.
Step 7
Cook until the chicken reaches 165°F / 74°C internally.
Step 8
Drain on a wire rack.
Step 9
Rest briefly and serve hot.
🌟 Conclusion
Crispy Golden Fried Chicken is more than just a recipe—it’s classic comfort food that brings people together.
With a flavorful buttermilk marinade, a perfectly seasoned flour coating, a little cornstarch for extra crunch, and careful frying, you can create chicken that is golden, crispy, juicy, tender, and packed with flavor.
Serve it with your favorite homemade sides, gather your family around the table, and enjoy every crunchy bite. 🍗❤️
😍 Final Serving Idea
Arrange the golden chicken on a large serving platter surrounded by creamy mashed potatoes, fresh coleslaw, buttery corn, and warm biscuits. Add a few pickles and your favorite dipping sauce on the side.
One bite, and you’ll understand why homemade fried chicken remains such a beloved comfort food! 🍗✨